| Last additions |

Almost Done-07125 viewsThe last structural item that needs to be done is the new overlay roof on the north face. Can't afford to do it this year, in either time or material. Even though this has been built on a shoestring, with salvaged sign faces for the sheathing, used telephone poles, discounted lumber (read some pretty crappy with the good), salvaged windows and all, it still probably cost me close to $1,000.00 all told for nails, needed structural stock and windows, plus the asphalt roof patch material.
RudiNov 18, 2008
|
|

Almost Done-0665 viewsLike I said, it ain't pretty. This is the corner that was heavily damaged last winter during the blizzards and heavy wind storms that we had a number of times. Two trusses were damaged, 4 sheets almost ripped off, 1 sheet gone.. but all is better now.
RudiNov 18, 2008
|
|

Almost Done-0559 viewsIt ain't pretty, but it certainly is well sealed. Not a hole, nail, screw or joint has not been fibre taped and spackled with roof patching compound. It certainly won't leak and that is the main concern.
Next year, if the budget allows, vinyl siding and the aluminum trim to match the main house will be added over the spring and summer.RudiNov 18, 2008
|
|

Almost Done-0460 viewsAll the windows have now been trimmed with brick mold. All the facia has been finished for the year. What is left now is to put on another coat on the roof and that should be that for this year.
RudiNov 18, 2008
|
|

Almost Done-0348 viewsThe last major trim job to be done this year is to still make the sliding doors to match the wood shop doors. Frames are there, and the stock is in the shop.. just need to finish the exterior for winter first. The plywood doors will have to do for a while yet.
RudiNov 18, 2008
|
|

Almost Done-0243 viewsWood Shop Doors. All the rubber foundation barrier is now down around the entire building. All joints, holes, and other imperfections in the 1/2 sheathing have been fixed. RudiNov 18, 2008
|
|

Almost Done-0147 viewsFront of the shop, 11 November, 2008. Big difference from last year at this time. Look Ma! No Snow !!!RudiNov 18, 2008
|
|
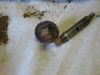
Switch contacts66 viewsThis is the actual heart of the switch. The contact clip and the shaft provide the ground for the kill switch. The end of the shaft has an insulator attached which spreads the contacts prior to switch engagement.BigdogNov 18, 2008
|
|
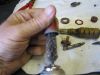
Clean-up57 viewsI wire brushed the inside of the switch to remove the corrosion. A rotating wire brush does the job quickly.BigdogNov 18, 2008
|
|
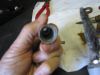
Inner bore55 viewsThe switch after wire brushing.BigdogNov 18, 2008
|
|
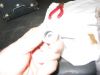
It's clean!62 viewsShowing the inside after cleaning.BigdogNov 18, 2008
|
|
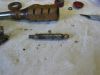
Shaft.54 viewsThis is the cleaned shaft with the spring replaced. You will find the spring from an old ball point pen is an ideal replacement part. You can get 2 replacement springs from one pen. This spring must be compressed into the shaft body while replacing the shaft into the switch body. There is not much room to do this and you never have enough hands.
Once the shaft is replaced into the switch body you can replace the end cap with a few drops of epoxy to hold it in place.BigdogNov 18, 2008
|
|
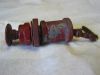
Switch and hardware70 viewsThis is the assembled switch with all the mounting hardware.BigdogNov 18, 2008
|
|
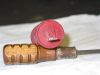
End view61 viewsEnd view of the switch showing the insulated cap crimped in placeBigdogNov 18, 2008
|
|
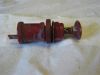
Side view57 viewsBigdogNov 18, 2008
|
|
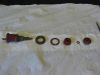
Mounting hardware106 viewsThis is the assembly order of the mounting hardware.BigdogNov 18, 2008
|
|
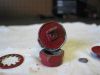
Removing the end cap57 viewsStarted removing the end cap. Note the pot metal of the switch body is very brittle. Re-assembly of the switch requires using an adhesive such as epoxy.BigdogNov 18, 2008
|
|
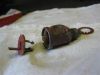
Cap removed63 viewsThe end cap of is now removed showing the contact clip. Note the gap between the fingers of the clip plus corrosion.BigdogNov 18, 2008
|
|
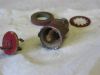
End view open switch59 viewsThis is a view of the shaft. Again, note the corrosion inside the switch.BigdogNov 18, 2008
|
|
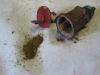
Rust59 viewsThis is the rust I dumped out of the switch body.BigdogNov 18, 2008
|
|
| 27665 files on 1384 page(s) |
 |
|
|
|
|
|
|
947 | |
|
|
|
|
|


