| Last additions |
|
|
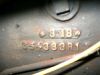
Serial number10 viewsCan't remember which on this is...Ronny BaileyNov 19, 2008
|
|

Rear planter16 viewsI've already removed the complete front planter setup.
This is the rear planter. When it is off, all that will be left to remove is the wheel weights. Haven't decided yet if the will come off or stay on.Ronny BaileyNov 19, 2008
|
|

Uncovered12 viewsThis was covered in dirt until now. You can tell how deep it was by looking at the rim.Ronny BaileyNov 19, 2008
|
|

A closer look at the wheel13 viewsThis looks better than I thought it would. Think I can still use it?Ronny BaileyNov 19, 2008
|
|

Starter13 viewsThis is my first look at this. It was covered up by the planter setup until now.Ronny BaileyNov 19, 2008
|
|

Magneto13 viewsThis is a great feature. It will save me the cost of a new battery and cables.Ronny BaileyNov 19, 2008
|
|

The back looks completely different now...17 viewsRonny BaileyNov 19, 2008
|
|
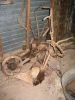
Another shot of that rear plow19 viewsRonny BaileyNov 19, 2008
|
|
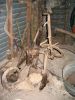
Rear plow17 viewsThis was more easy to get off than I thought it would be once the bolts were loose.Ronny BaileyNov 19, 2008
|
|

Front planter and plow are off19 viewsThese were kind of complicated since they were kind of hooked together. Now I can get to the right side of the engine for the first time.Ronny BaileyNov 19, 2008
|
|
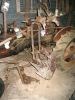
Planter plow is off!23 viewsThis was so heavy all I could do was move it to the side and tie it to the side of the tractor with baling wire. 20 years ago, I would have tried moving it and hurt my back.Ronny BaileyNov 19, 2008
|
|

Bigdog Reindeer22 viewsBigdog ReindeerscrewstickNov 18, 2008
|
|

Stencil Font25 viewsStencil FontscrewstickNov 18, 2008
|
|

Shelving-03188 viewsSlow going when there is just one of you... but it is progressing.RudiNov 18, 2008
|
|

Shelving-02414 viewsThis is the first of the shelving units that will be built for my implement and part storage. 2 foot between shelves and each shelf is 3 foot deep. And yes.. there is room to park a cub either butt first or nose first under the bottom shelf.RudiNov 18, 2008
|
|

Shelving-01149 viewsThis is the Parts Pail storage unit. I had about 13-1/2" between the old shop wall and the first 4 foot x 4 foot window, so it became a natural for my parts pails. There are 4 shelves 50-1/2"x13-1/2" with the top shelf reserved for shorty pails.RudiNov 18, 2008
|
|

Almost Done-10137 viewsThe foundation/grade line was sealed against moisture ingress. 45mm to 65mm salvaged rubber dam and salvaged tractor trailer or loader inner tubes were cut to size then stapled and nailed to the building and then buried about 12" deep around the entire building.
The ridge was sealed the same way so that no snow or rain etc., would leak into the new building or onto the old roof which leaked. Now it is dry and actually quite warm when the sun is shining. Lots of ventilation, but no openings for water.RudiNov 18, 2008
|
|

Almost Done-09124 viewsRoof looks nice. Every hole, every nail, joint and defect has been patched with fibre tape, then 2 coats of ashpalt roofing patch. Then I added one coat so far of heavy ashpalt driveway sealant.
NO LEAKS!
RudiNov 18, 2008
|
|

Almost Done-08133 viewsStarting to get some room in here. Shelving system is going up at the moment. Need to get the implements and such up and put away before the snow falls and stays. RudiNov 18, 2008
|
|
| 27665 files on 1384 page(s) |
 |
|
|
|
|
|
|
946 | |
|
|
|
|
|


